Friday, 28 December 2012

Spiced Lamb Burgers with Caramalised Onions and sauteed Veggies

Hello again!!!! Long time no see. I have been busy with a few important events which includes my month long holiday in India. It's always lovely to spend some time with family and friends and then came the Christmas season which meant busy month at work. Now that Christmas is done with , I am back on my blog. This recipe today is perfect for a cold winter evening and as you can see in the photo, I did replace the fries with vegetables giving it a healthy touch. The best part about this dish is that I used just one frying pan to cook the burgers, veggies and onions at the same time which saves up a lot of washing. You can replace lamb mince with beef or pork in case you are not a big fan of lamb.
I used some red hot smoky BBQ sauce on  the bread but you can replace with ketchup if you want it milder.
So easy and fast, this is your ultimate rush hour dish. The burgers could be made well  in advance and they can stay for 3 days in the fridge. So, all you need to do is just cook.So, let's begin.

All you need is.....
Lamb Mince- 400 gm
Red Onions- 1 chopped and sliced
Ginger Chopped- 1 inch piece
Garlic- 4
Coriander leaves - 1/2 bunch
Mint Leaves - 1/2 bunch
Red Chili- chopped -1
Spring Onions-sliced- 1
Egg- 1
Coriander and Cumin Powder-1 tsp each
Salt - to taste
Burger rolls/ ciabatta buns/ anything you might fancy- 4
Olive Oil-50 ml
(mix veggies of your choice if you want to eat some veggies with your burgers, like me)

This is how we do it....
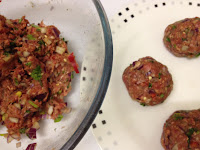
Mix all the above ingredients to the mince except sliced onion, bread rolls and veggies, of course. Make 8 equal size balls and flatten them between your palms.
Set them to the side or in the fridge with cling film over them if you are not cooking them immediately.
Get a pan on the stove, add Olive oil and wait until it's hot. Make sure the heat is on medium and the pan is not smoking hot before you drop your burgers in. Turn them over when they are nice and brown and then move them to one side of the pan. Add the onions in the same pan next to burgers and caramalise them at the same time while cooking the burgers.
Push the onions to one corner of the pan once they are half-cooked and get your veggies in the same pan. The fa and juices from the mince will add a lot of flavor to the veggies and onions. All you need to do now is just sprinkle some salt and pepper over the veggies. This entire cooking process will not take more than 7-8 minutes. Once the burgers are out of the pan get your bread rolls in it and slightly toast it. The bread soaks all the remaining juices in the pan and takes in a lot of flavor so that you don't have to depend on butter or mayonnaise for that.That's another healthy tip there. The burgers have to feel very firm when you press them with your finger to check if they are cooked. If not use a food thermometer in case you are not sure of the 'touch and feel' method. It has to be over 70 degrees  Centigrade in the center of the burger.

Once, the bread has been slightly toasted, time to put together the dish. I made mini burgers, so everyone gets 2 each on their bun,some caramalised onions on top, coriander and mint leaves as garnish and a squeeze of your the red hot BBQ sauce. Veggies on the side and VOILA!!! It's good to get into your tummy. 


Sunday, 30 September 2012

My 'Mean Thai Green Curry'

My blog got it's 1000th hit today so to celebrate that i will be posting the recipe of something that is so close to my heart and my most favorite of  all curries. No, i am not talking about India this time, it's the Thai Curry that i am talking about. I absolutely love Thai food. The flavors are fresh  and so delicious. They took their inspiration from two culinary giants in the world, China and India and came up with this absolutely delicious and fragrant Cuisine which made it's mark all across the world map. At the same time, it's not complicated or time taking to make this curry. I am going vegetarian today but meat lovers feel free to add meat of your choice or seafood even.Before we get into the ingredients , i would like to thank that some one who keeps following my blog in Russia very often. I do not know who you are but thanks a lot for being my regular follower and i hope that you are liking it.

Ingredients for the Curry Paste( to make 4 portions)...
Spring Onions-4
Ginger- 2 inch piece
Garlic- 4 cloves
Lemon Grass- 2 sticks
Lime Leaves- 5
Basil Leaves- 20
Coriander Leaves- 1/2 bunch
Galangal(if you could get hold of it its ok if you cant)- 5 pieces
Green Chillies- 2
Limes-2(juiced)
Coriander powder-1 tbsp
Cumin Powder- 1 tbsp
Light Brown Sugar/ honey/ caster Sugar- 2 tsp
cut all the ingredients into small pieces( except powder,sugar and limes) and blend them all in the food blender adding a bit of water to make a fine paste.As simple as that.
For the Curry....
Baby Corn- 4 nos
Brocolli- 200 gms
Mushrooms- 100 gms
Red Peppers -100 gms
Cherry Tomatoes- 6 -8
This is just my idea of veggies, you can add any other vegetables that you like. 
Thick Coconut milk-400 ml
Salt- to taste
I also used a little bit of pak Choi lettuce but then you can replace it with spinach or any leafy veggies of your choice.


This is how i do it......
Heat the wok with some oil in it. Once the work is very hot add all the vegetables(except for the leafy ones) and quickly stir-fry them for about 3 minutes.
Remember! Never over cook the vegetables or cook them till very soft. They still have to be crisp when you bite into them. 
Once the veggies are stir-fried add the green curry paste and cook it along the veggies for about 5 mins until the ginger and garlic in the curry paste does not taste raw anymore.
Then get the green leafy vegetables into the wok and then lower the flame and fry for about 30 seconds.
Then, its time for that creamy coconut milk to jump into the wok.
Once, the cocnut milk it is, simmer the heat and just bring the curry to a slow simmer which would take about 2 mins.
Time for the salt  and a final tasting and if you are happy...DONE!
The cooking part will not take more than 10 mins and the prep not more than 15 . So, in less than half an hour you can make an absolutely fragrant, fresh and delicious Thai Green Curry. If you want you can make the curry paste in big quantity and freeze it and what you need to do next time is just cook of the meat/seafood/vegetables and add the curry paste and finish it off with coconut milk which will take you not more than 15 minutes. Fresh and healthy and quick and easy as i always like my recipes to it.
I am a regular to Thai Restaurants and have tried Thai Green Curry wherever i went but it's only when i cooked it myself i realised how different is the freshly  ground paste to the one that we get in a jar from a store.
Try it and you will know what i am talking about.
HAPPY COOKING!!!!


Sunday, 16 September 2012

Curried Chicken and Sweet Pepper Roll

This dish, I  had to make it in a rush as me and my flat mate were starving and wanted something easy and delicious. All we had was some Chicken, Spinach , Sweet Peppers, Onions, Ginger, Garlic , Spices and Tortilla wraps. I thought of Chicken Curry to begin with but then i wanted to use all that fresh veggies and herbs in the fridge and empty it out. So, i decided to go for tortilla wraps instead of rice and curry and have a bit of Mexican influence but chapatis or parathas work great too. To this i added some mint yogurt as a cooling agent. Without wasting any more time let's get the party started.

What do we need.....
Chicken Thighs -4
Red Onion sliced-1
Tomato sliced-2
Red Chili chopped-1
Red,yellow and green peppers-200g
Baby Spinach leaves- 20
Coriander leaves-2 stalks
Mint leaves- 2 stalks
Yogurt- 100 ml
salt -to taste

Chicken Rub....
Coriander Powder-1tsp
Cumin Powder- 1 tsp
Turmeric Powder-a pinch
Ginger and Garlic Paste-15gm
Mix these ingredients well and rub the chicken with the marinade.
Chop some mint, add it to yogurt and mix well.Keep it in the fridge.
What do we do..
Get a frying pan on the stove.Get some oil.
When the oil is hot add red chilies and onions.(save a few slices for garnish)
Cook till onions become soft and transparent.
Add the peppers and half cook them.
Add tomato slices( save some for garnish).
Now, what we do is something different than normal. Push all the veggies in the pan to a side so that you have a half empty pan and then drop the chicken in that empty half, just like in the photo.

Get some Coriander leaves on the pepper-onion mix.
The chicken cooks in the juices that came out of the pepper and onion mix and take in all that flavors.
Turn the chicken from time to time ensuring that all the pieces are in contact with heat and they are not sticking to the pan.
It will take not more than 5-6 mins to cook the chicken.
During this 5 minutes get the tortilla wrap and heat it up on a pan for about a minute.You can use Chapatis too.Left over chapatis and curry can be used to make these amazing rolls too.Then, we start building the roll.
In the center, we spread spinach leaves first (any lettuce can be used as substitute) and then we lay some tomato and onion slices on spinach. Think of colors when you build this roll. Green, red, white and then some mixed peppers that have been cooked in then pan. It's a riot of colors on the tortilla.Then ,cut the chicken thighs in half and rest them on the pepper mix.

The final ingredients to go on them will be a nice spoonful of mint yogurt and coriander leaves.
That will be the lovely filling and all we have to do now is roll it.Make sure you fold the sides in when you are rolling so that nothing of that good stuff runs out of the roll.
Get the roll on a cutting board and then cut it in half on an angle.Get the rolls on the plate and just one last thing that's left to do and that is 'EAT'. There will be a burst of different colors and flavors all in one single roll and you just cant beat it.It had meat, veggies, yogurt, herbs, salad and a whole wheat tortilla. Everything that your tummy needs , just in 20 minutes.


Sunday, 9 September 2012

Buy local, try international....

It's almost the end of Summer and there is one event that i look forward to every year at this time of the year. Yes, it's the weekend of 'Brighton and Hove Food and Drink Festival'. It's the time where all the best local produce gets displayed by the local farmers and at the same time the most famous restaurants that serve not just British food but also International food supporting the local produce and farmers also get to show off their talent.This year they even had a separate venue to organize 'Kids food festival' and i think this is just great. I emphasize so much on parents getting kids involved when it comes to cooking and food. They need to be educated on what's good food and what's not so good. So, having a kids food festival and parents bringing their kids to it is an amazing sight. I really appreciate all the restaurants and local suppliers who took time to have their stalls up to educate and entertain kids and wonderful that the organizers did not let any fast food junk chains to have their stalls there.


Now, supporting your local farmers and buying local produce is not really a new concept. This is being done for centuries now and even before the money exsisted. Local farmers always exchanged their produce in return of something else from other farmers which was called 'Barter System'. Coming back to where we are at the moment  there has been lack of this support a few years ago when big super market giants completely took over the market and farmers had to face a really tough competition.Shopping at a supermarket became more fashionable for a lot of reasons.Luckily the council realized how important it is too keep the local producers in the business for a number of reasons and started organizing such events.Some of the main reasons are the local produce is fresh, brought and sold in the market almost same day. Next, they create employment opportunities when their business is supported by all the restaurants and hotels.Other important reason would be that the crop is seasonal and keeps changing accordingly and helps the chefs to think out of the box and create new dishes on the menu with seasonal produce.Main reason being it helps the environment a lot.

Me with Rachida,supervisor at The Chilli Pickle
 Coming to the restaurants, there was a lot of participation from Brighton's best international restaurants. The Chilli Picke (where i used to work before) is not just Brighton's best Indian but i would say entire south of UK if we exclude London.Last year we did some live cooking shows as part of the festival but i wanted us to have a stall there to give the crowd a glimpse of the restaurant and the food. But it did not happen. This year they went ahead and had a food stall and it was really good to see them as a part of the festival.Because i worked at The Chilli Pickle before i know for sure that all our vegetable , dairy, fish and meat suppliers are local.They supply every single day and the produce is all so fresh. This is one reason why the menu keeps changing so many times at the restaurant because of the seasonal availability.
The suppliers are so easily accessible as well when they are local and used to bring us the supply even at a short notice. That's a great advantage as well.These days if you see any good restaurant menu, they always mention where does the meat come from, the fish and the vegetables as well.The chefs take pride in doing that as this is to let the customers know that everything comes fresh which is a great marketing technique to pull more customers.Half of the battle is won when the supply is fresh.


Many more famous restaurants like Moshi Moshi, Sabai ,Wagamama, Terre a Terre , Carluccio's and many more that serve food form all over the world also took part in this event and extended their supply to the local producers and suppliers.The relationship between the restaurants, local suppliers and farmers is like hand-in-glove.You support them and in return they supply you with best seasonal availability.
No matter i work for an International Brand or just one restaurant that served best International food , I always and will always support local shops and visit more often than a super market. That doesn't mean that i will just try local food. I love what world has to offer when it comes to food but it always tastes best when the fresh local produce is used. So......BUY LOCAL AND TRY INTERNATIONAL.

Wednesday, 29 August 2012

Corn, Spinach and Egg fried Rice with Chinese 5 spice mix

I am a big fan of 'wok' and love to use it in my kitchen as much as possible. To me, it is one of the 'must haves' in the kitchen. Today being a bit rainy and cold i was not in a mood to step out and decided to make do with whatever i could gather in my kitchen. There is always corn in my fridge as most of you who follow the blog must have already guessed,spinach and some frozen mix veggies . I have eggs, rice , onion and garlic and some spice mixes. So, i decided i will cook egg fried rice and add some lovely veggies to it and spice it up a bit with hot sesame oil and    Chinese five spice powder.This again is  one of the simplest and delicious dishes to make.Let's look at the ingredients.
Basmati Rice, Sweet Corn, Carrots, Green Peas, Chopped Spinach, Chopped Onion, Chopped Garlic, Spring onions, Eggs, (about an egg for 100gms of rice), Soy sauce, Sesame oil, (i am using the one that has been infused by ginger and chili hence i didn't use these ingredients separately but you can use plain oil and add chopped ginger and red chili to your onion and garlic) and Chinese 5 spice powder.
That's all it takes to make this delicious rice dish.
Cooking the Rice...
Lot of them who attend my cooking lessons ask me about easiest way to cook rice and i always give them what i call the 'blind method'. This is when you actually follow the same steps of cooking pasta when cooking rice. Without measuring water to rice just take as much as 3 times more water to rice and let it boil with salt. Wash your rice 3-4 times to get as much starch washed off as possible, Add the rice to the boiling water and keep giving it an occasional stir and once you feel that the rice  is 90% cooked just strain all the rice into a colander  or strainer and let all the water drain away. Get a sauce pan with water on the stove again and put the colander or strainer with rice on it making sure that the water doesn't touch the rice and let the steam cook the rest of 10% of the rice. Cover the rice when its back on stove. That's it! You get lovely non sticky and not over cooked rice.

The Fried -Side Story....
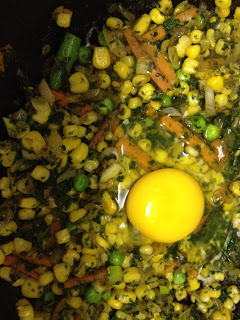
Once the rice is cooked and set to cool on the side, get the wok on full heat and add sesame oil. Once the oil heats up quickly drop garlic, spring onions and onion and give it a really quick stir so that the garlic does not burn. Add the veggies but not spinach and stir fry them for a couple of minutes. Add the chopped spinach , soy sauce and Chinese five spice powder and crack the egg into the wok. Let the egg cook for about a minute before you stir it and break it as if making scrambled eggs. After 30 seconds , add the rice, salt and pepper and mix it all up well really quick. Add Basil leaves and some coriander to finish.This entire stir frying process should take not more than 5 minutes starting form heating up the oil. Always ensure that the wok is on full heat and you keep stirring the ingredients from time to time so that they don't burn or stick to the bottom. This rice tastes great when it's served piping hot right form the wok and also acts as great accompaniment to lot of simple curries or stir fry sauce based dishes.Give it a go, it takes lesser time than delivery form your local take away.


Thursday, 23 August 2012

Spicy Sweet Corn and Fennel Fritters with Sweet Chili garlic sauce.

I am a big fan of corn and this is always on my list of vegetable shopping. In season i always buy them fresh on the cob and in winter  i will make do with frozen sweet corn. I just love the sweetness in it and it could be used in so many wiays when it comes to cooking. So, i got some fresh corn for my fritters this time.
This recipe is more like the recipe of 'Pakoras' or 'Bhajis' but for the first time i tried using self-raising flour instead of gram flour or besan that is used traditionally.This thought suddenly struck me as gram flour upsets my stomach and i was looking for the next best alternative and remembered that my Mom used to make these lovely 'Pakoras' using plain flour instead of gram flour and they tasted great but the only problem was they got all rubbery when they became cold. So, i tried self- raising flour and it worked great.
Another change that i made was i did not deep fry them, i just shallow fried them in pan and that worked well too. This is so easy to prep and cook. So, give it a try.


What does it take....to make
Sweet Corn (fresh or frozen)
Green Peas
Mix Peppers
Carrots
Coriander leaves
Ginger
Garlic
Onion
Green Chilies
Fennel Seeds
Cumin Powder
Coriander Powder
Salt
Self-raising Flour(in case you can't find it ,use plain flour and some baking powder.Every 100 gms of flour will take 10gms of baking powder.
Now, you must be thinking how come i did not mention water to mix the flour.No, we are not using any water to make this mix. We will use all the moisture in the veggies and make this mix.
Ok, let's begin....
Get a bowl and cut all the vegetables into small pieces and if its whole corn on the cob then get the kernels out. Chop ginger, garlic and chili.
Then add the veggies to it, fennel seeds, cumin powder,coriander powder and salt. Add a handful of flour to the veggies and kind of squeeze the vegetables while mixing with flour so that they release enough moisture to    form into a thick batter.
Once the batter mix is ready, it should be sticky but not too wet or too dry.Add more flour if its too wet and a dash of water if too dry. Get some water in a bowl so that you can wet your hands when you are making the patties out of the mix.
Get a frying pan on the heat and pour enough oil just to cover the entire bottom of the pan.
Once the oil is hot , make lime sized balls out of batter and press them in between your palms so they look like patties and do not forget to wet your hands for every ball.
Drop them into the oil and cook in each side till they are brown and crisp.Do not cook them on high flame as they will result in browning out side but raw inside. Cook them on a medium flame.
Once they are done, drain them on kitchen towel and serve them hot with some sweet chili garlic sauce.
Now, making this sauce at home is very easy. Get some dry chili flakes or fresh chopped red chili and some chopped garlic. Use brown sugar/palm sugar and little bit of water to make it into a syrup and add some vinegar to it.Finally add chili  and garlic and give it a boil.The dip is ready. Sprinkle some fresh coriander leaves on top and eat them while they are hot. It's not just the flavors that i love about this snack,i love the colors too. They look so appetizing.Go on fellas.....you know you want them.


Saturday, 11 August 2012

My Very Berry Pancakes


Posted by PicasaAs i promised in my previous blog, here is my recipe that is really easy to make and kids will love to get involved and they will love eating them as well. My very berry Pancakes. I already started getting responses from parents ,mothers especially about getting their kids involved in kitchen and they said that kids really enjoyed it and sent me some photos as well. Will post them in my next blog. Now, lets get back to these yummy pancakes. These are so unbelievably  easy to make that a seven year old girl made them for her mother in my class today. Her mom had tears of joy in her eyes right after the first bite. It was a moment of emotion for me too.I would say weigh all the ingredients and get them ready for kids and help them while whisking egg whites and cooking them. They can easily do the rest. I am using fresh berries as they are in season now but they can be easily replaced with any other fruit. Bananas, mangoes, pineapple ,peaches, plums, coconut...and the list goes on. You will also see that i am not using any sugar in the recipe except a sprinkle of icing sugar in the end but that's optional.Let's get into the recipe now.

IN THE ORDER OF APPEARANCE....
Plain Flour- 115 gms
Baking Powder-2 tsp
Medium Eggs- 3
Milk- 140 ml
Salt- a pinch
Vanilla essence- 1 tsp
Butter- 40 gm
Mix Berries- 100gms
Honey- 50 gms(you can use maple syrup if you feel like it but i replaced it with a healthier substitute)
Icing Sugar- 10 gms
That is all it takes to make 6 amazing pancakes.

THIS IS HOW WE DO IT....
-Add baking powder to plain flour and mix well.
-Break the eggs and separate yolks and whites in 2 different bowls.
-Make sure there is no yolk at all  in the whites as this will not let whites become fluffy and stiff when whisking.
-Add a pinch of salt to the whites.
-With a fork gently beat the yolks just to ensure that they are all mixed well.
-Add Vanilla essence to the yolks and mix well.
-Make a well in the center of flour and add the yolks to it.
-Add half of the milk and mix it well using a whisk to form a thick paste. Use a whisk to do this and always whisk in one direction, clockwise or anti clockwise to trap the air in.
-Add the rest of the milk and mix well till it forms a smooth batter with no lumps.Wash the whisk and this is important before you beat the egg whites.
-Now, time for adults to jump in and whisk the egg whites. It takes some time and energy to get the whites into a nice foamy, white, stiff soft peak consistency. If you are not sure what i am talking about then just whisk until all the egg whites turn into thick foam like in the bubble bath and when you lift it with whisk the whites should just stick to the whisk and not fall into the bowl. If you are still not sure then the best trick is to turn the bowl upside down over your head and if the egg whites do not fall then they are ready. Do it at your own  risk. What if the egg whites fall down? Simple. Clean up and get fresh eggs ;-)
-Once your whites are ready, add them slowly to the yolks and with the help of whisk or spatula mix them together gently and again just in one direction.
That's it. Your mix is ready.

LET'S PAN THE CAKES....
-Get a non stick pan on medium heat and add a little bit of butter. You can do 2 pancakes at a time in a medium size pan.
-Once the butter has melted and starts bubbling get a ladle full of the mix and slowly drop it into the pan.Cook them on a low flame and once you see that the little air bubbles start bursting on the top, its time to get the berries on.Now, i make a stack of  3 pancakes, so i make a plain one, mix berry one and one with the berries i like most and i used raspberries for that.Just to give the pancakes a different color and texture.Just like in the photo.
-Once the pancakes are golden brown on one side them flip them over and cook  gently. It takes a minute to minute and half on each side.
- Flip the pancakes and see if both sides are golden brown, if they are then it's time for them to go onto the plate.
- To make it more interesting i make a 3 pan cake stack with berries in between each pancake as well.As i suggested earlier you can use any fruits your kids like.
-Time for the honey or maple syrup to go all over the pancakes and a little dusting of icing sugar and here we go with a stack of fresh and fluffy home made pancakes.
-They have milk, eggs, honey and fruits and they are all good for your kids.
-Eat them hot and always share. Remember, to share is to care.What are you waiting for???Let's get breakfast going.

Tuesday, 7 August 2012

For Kids sake....

Today i taught my first Kids cooking lesson. I know my work is being appreciated a lot by the adults but i was not sure if i will appeal to the kids. These kids are all below 12 years and they were so excited to do their own pasta from scratch. They paid so much attention to the class and took cooking pretty seriously. In the begining i thought they will call their parents and ask them for help but no one did. I am quite impressed and the moment of the day was when they asked the parents to taste it. The happiness in their little eyes once they cooked the pasta and the pride on the parents faces,it all adds up to my motivation at work.Those Kids and parents were so thankful after the lesson and everyone took some photos with me before they went home.Here, i would like to specially thank those amazing parents who got their kids involved in such a great event. Also a million thanks to my boss Jamie Oliver for insisting that parents should get their kids involved in cooking and also need to know what is right and what is wrong when it comes to eating habits and coming up with lessons for kids.I am looking forward to teach another 2 lessons for kids this week. It's so much fun cooking with kids because un knowingly the kid inside you will come out too.So, parents please let your kids  get involved in good food be it at home or at school.

I work right opposite to a famous American fast food chain and there are 2 more next to my work place. Sometimes, i keep looking out to see the amount of kids, teenagers and adults that keep going in and out of those  fast food giants. I see this middle aged obese man almost every second day walking into this store and walks out with a 'bucket' of fried food. What hurts me more is to see that he brings his 2 kids along every second day and feeds them the fried food. These kids are not older than 10 and both of them are obese just like their dad. What i fail to understand is this guy knows he is over weight and i am sure he faces a few health issues but he still would feed the same food to his kids.I do not why understand why does he not think? Aerated drinks just add fuel to the fire.I see those kids holding large glasses of those aerated drinks.There can be 1000 reasons that one might want to give why they can't give their kids fresh and healthy home made food but not even one of those reasons would be worth their kid's health. I am not saying that we should completely stop taking our kids to those fast food chains.Even i have craving for it once in a while and i do go and eat but i limit it to once a month. I want parents to do the same. Make this visit a special one. Make it once or twice a month and let the kids feel special that you took them there for a treat. I am not going to be a hypocrite here and say everyone in my family follows a very healthy and planned diet when it comes to their kids but i do keep talking to them and educate them more and more and i have seen the change. A slow change but there is always the beginning. I do not want things to change over night either because kids love their favorite fast food and you cant take it off from them right away. Start decreasing the quantity and number of times you take them every month.

There is something else that bothers me. Buying ready made baby food and feeding the baby is something i will never approve or agree.Why is it so hard to mash some potatoes? Is it so hard to puree some parsnips?Is it so hard to blend some apple and banana? I am sure most of us would agree that there was no ready made baby food in the market when we were babies. Our mothers took a great pride and responsibility in  making fresh food 3 times a day for us when we were babies just to make sure that we get the best.Also they would follow a good diet plan to see that we all got all the nutrients through food and we all grew up healthy. If this could happen 20-30 yrs back it could happen now too.My mother feeds her 3 year old grandson the same what she used to give us when we were kids. He is allowed to have a treat once in a while but what i see is he never complains or cries for chocolates or fast food.This,to me is great.We could always say that working parents have no time to cook. I disagree. I will again give an example from my family. My cousin lives in London with this wife and 18 month old son.Both of them work 5 days a week. Saranya, my cousin's wife is not a great cook. In fact she struggles in kitchen.But, i have never ever seen her going and buying baby food off the supermarket shelf.She makes sure she cooks his food every single day and 2 times in spite of going to work.Whenever i visit them she asks me questions about what can she do with the vegetables she has at home for Dhruv(my nephnew).This little one loves yogurt. So, she tries to hide the veggies under the yogurt and feed him . I am really proud of her.

To me kids are kids, anywhere in the world. So, what i learnt today is kids do love a bit of cooking and eating home made food if encouraged by parents.I taught 8 kids today all from different countries and ethnic backgrounds and they all were equally excited and equally delighted.All they need is a bit of encouragement. At the same time i see a father taking his kids to a fast food restaurant every second day. So, parents role is very important when it comes to eating habits of kids.Please do cook more often at home and get kids involved in helping. Parents need to change before they try to teach kids because kids always look upon their parents while growing up and try to follow them. I decided that i will keep posting some easy recipes that parents  follow and kids can enjoy eating.This will be my commitment through this blog. I do salute all the parents who take the food of their kids seriously and to others i request to THINK.For the sake of our Kids and future generations. Thanks for reading.


Sunday, 5 August 2012

My mouth watering Indonesian Satay with Peanut Soy Dip

If there is one dish that would make my mouth water just by listening to mere  name of it then it has to be the famous 'Satay'. Countries like Thailand and Malaysia claim that it's their own creation, it's strongly believed that it has originated from Indonesia and I quite agree with it. Satay has actually been adapted from Indian Kebabs on Skewers which again is an influence of Persia.When the traders traveled from India to Indonesia in search of the famous Spice Islands they made these Kebabs very popular there and since Indonesia has some best countries surrounding it , it took a bit of inspiration for all those countries and came up with their own version of grilled meat on sticks and called it 'Satay'. This dish became an instant hit and was featured on all the restaurant menus and road side eating places and then traveled all over the world making the country very proud. It was so popular that it was declared as the 'National Dish' of Indonesia.This , to me is one of the most easiest dishes to cook and especially when you are expecting friends or guests over as it hardly takes any time or effort to make it. I am using chicken for my recipe but you can use just some crisp vegetables for vegetarian version and King Prawns if you are big fan of sea food. Now, i do not expect every one to have a grill or barbecue at home. This can be cooked in the oven and in case you do not have an oven just pan fry them. They will still taste absolutely amazing.Let's start with the marinade.
-You need garlic,ginger, spring onions ,red chili and onions all chopped up.
-Get some roasted peanuts or roast some peanuts (take the husk off once they are roasted).
p.s. you can even use peanut butter.
-Get the peanuts into a blender and add the ginger, garlic, spring onions, red chili and onions to it and blend adding a little bit of water to make it into a thick roughly ground paste. You still need to taste the bits of roasted peanuts in the sauce.
 (Now, a bit of history. A lot of South Indians especially Tamilians migrated to Indonesia during the Dutch rule and Indonesia was then knows as The Dutch East Indies. I am pretty sure that this peanut chutney has been the influence of Tamil Cuisine in Indonesia as this Chutney is very famous till today in South India and is a great accompaniment for famous South Indian snacks or breakfast dishes such as Idlis, Dosas, Vadas etc.. My mom makes a great peanut chutney though i prefer the one that's made with fresh coconut.)
-Back to the recipe now, Once the paste is done , get that into a pan from blender and add some sugar and sweet  soy sauce. If you cant find the Indonesian soy sauce use the dark soy that's available in the market.
-cook this paste slowly adding a little water at a time if you see that it is sticking to the bottom of the pan.
-Add salt and check for taste. It should taste spicy, gingery, sweet and nutty. Cook for about 5 mins and take the pan off the stove.
-Chicken, i strongly suggest thigh rather than breast. Thigh has more flavor than breast the reason being it has fat. Fat really helps the chicken to get a great flavor especially when cooking involves oven roasting /grilling or pan frying. Take the skin and the bone off and cut the meat into cubes. I would cut one thigh into not more than 4 pieces.
-Rub the chicken pieces with turmeric powder(another Indian influence) and then smear the peanut paste over them . Make sure that chicken is completely covered with peanut paste and get the pieces onto the bamboo skewers(soak the skewers in cold water before you get chicken on them so that they stay moist while in the oven or pan and will not burn or break.)
-Also make sure you do not use all the peanut paste, keep half of it for your dip.
-Get them into a baking tray lined with grease proof paper or place them on the iron mesh with the tray underneath to collect all the dripping juices if cooking in oven.
-If you are planning to pan fry them then just get the chicken onto a plate and refrigerate them for an hour.
-Best way to cook it is to use a charcoal grill but as i said  earlier if you do not have one no need to worry.Oven or pan is good enough. But, if you can get your hands on the use and throw barbecue that we use on the beaches ,nothing like it.
-While the chicken is cooling off in the fridge, we make our sauce.
-Very simple. Get a pan, heat some oil. Add some chopped onion, garlic and ginger and the remaining peanut paste. Add more soy sauce and water. Check for seasoning and once you are happy with it let it come to a quick boil and when you see that it formed into a smooth sauce take it off the stove and add some coriander leaves.That's all there is to it.
Now, cooking the chicken. If you are using an oven pre heat it to 220 degrees Celsius and get the chicken in it and keep turning every 3 minutes brushing it with a bit of oil every time you turn. It will not take more than 10 minutes to cook the chicken through.
-If you are using a pan, just a little bit of oil in it, heat it and let your skewers sit in the pan and keep turning them every 2 mins on medium heat. Keep brushing them with some peanut sauce every time you turn them for more flavor. Check after 5 mins and the chicken should be pretty much cooked.
-Do the same if you are cooking them the grill. Keep turning them and paste them with oil and satay sauce.
-Once they are all cooked, get them into a plate, sprinkle some chopped spring onions and serve them hot with the lovely peanut soy sauce which is popularly known as 'satay' sauce.
- All it takes is about 30 mins of prep and cooking time and an hour or marinating time and this my friends, is the time more than worth it for those lovely and absolutely delicious 'Satay' skewers.

Tuesday, 31 July 2012

Here i go with my version of 'PHO'!!!

Working at Jamie Oliver's Recipease is like a dream come true. I get to teach so many different cooking lessons and at the same time learn a lot a about some of the best dishes and cuisines of the world. Vietnamese  street food was my very first lesson and and now it's one of my favorite cuisines of the world. Vietnam is known as 'the lightest cuisine of the world' and this food is getting highly popular in west for it's high nutritional values. Pho' is their national dish and they take so much pride in cooking it  and having a bowlful of it almost every single day.
Now, what is this all about? It's a perfect and complete meal in itself as it has got all that you need in your balanced diet. Protein, vitamin, calcium, carbs, starch, sugar and loads of amazing flavors, aromatic herbs and spices. All in one single bowl. When making Pho i always follow the '4-S' rule which is balancing the 4 main flavors all starting with the word S. Spice, Sweet, Sour and Salt. If you can get all those flavors balanced well , half of your battle is already won. Pho is a soup that is made out of stock. Please , i insist that we use stock instead of water and again i plead not to use those artificial stock cubes. Make your own. Doesn't take much time at all. All we need to make sure is the stock is clear. You can see in the picture above how clear my stock is, almost like water and you can see through all the contents in there.So, let's start with making a stock. I  did a vegetable Pho so i made vegetable stock. If you are doing a chicken pho then all you have to do is wash the chicken bones or even give them a quick clean up in a pot of boiling water so that  you are getting rid of all that fat and bits of flesh the bones might have that make your stock cloudy. Once the bones are all clean throw them in the pot with veggies and simmer it with lots of water for an hour. Simple!!!OK, back to our vegetable stock.
-Take a deep sauce pot  and throw in all the bits of vegetables that you do not want to be in your soup( peel of carrots, end bits of spring onions, onion peel, chunks of fresh sweet corn, brocolli stalks, sweet peppers trimmings and so on depending on what veggies you fancy using)
-throw in a few 1 inch sized pieces of ginger, crushed whole garlic and small red oninon cut in quarters and a couple of red chilies.(Red chili is the first S which is spice)
-Add 2 tbsp of dark Soy sauce for every liter of water and that is out next S- salt.
-Add 2 tbsp of vinegar which will be our 3rd S-Sour.(I prefer less vinegar and when i finish the soup i add sourness to it in the form of fresh lime juice.) Never add lemon or lime juice to anything and cook it for long as this will result in a bitter end product.
-Finally, get the final S in which is sweet. I prefer honey instead of palm sugar that they use in Vietnam or the light brown sugar that is used in most of western countries. Get 2 tbsp into the water.
-Time to get our spices into the stock. I use star anise, cinnamon, Cloves and cardamom. Throw them into the stock pot.
-Finally, lime leaves or lemon grass because it's the ultimate natural flavor enhancer for the stock.
That is all . Get it going on full heat till it comes to a boil and then simmer it down and let it boil very gently for about 30 mins.
While the stock is simmering away, time to get your veggies ready. Since fresh corn on the cob is in season now i just sliced a few chunks and threw them in my stock. Once they are cooked get them out of the stock and keep them aside. We will need them for the soup. I used green peas, carrots, green beans, sweet corn,yellow /green/red peppers and spring onion. Chop, dice and slice all the veggies.Keep them ready.
Now, taste the stock and you will see how amazing it tastes with all the ingredients in it. Strain the stock through a sieve and get it into a wok or big pot. You will get a clear stock. Add your veggies to it and let it simmer slowly. Get some rice noodles and pop them into the simmering stock with veggies. Noodles and veggies literally take 4 mins to cook not more. Do not over cook.
Finally, i check for salt and add a little if we need more. You like it more spicy then add another chili by all means. Take it off the heat and squeeze a lime or lemon into it.
I always finish my dishes, especially soups with handful of fresh herbs and here i used loads of fresh coriander and basil.We end up with this absolutely full-on good health soup. You want to add chicken to it, go ahead.Get your chicken in along with your veggies.Same with prawns or fish.
You must have or not noticed that i did not mention any oil, fat or butter to this dish because we do not need any of those bad boys. That is why i said its a bowl full of health in it.
Health food/ diet food does not have to bland or boring. It could be even better tasting than regular food.You have a big bowl of Pho and see how light your stomach feels even after it's full.
Give it a go people. You will not be disappointed.SO, Let's go and make some 'PHO'!!!


Thursday, 26 July 2012

Sun blushed tomato, Spring Onion and Lime leaf Prawn Curry

I always loved taking traditional recipes and play around a bit to give it my 'touch' and this is one of the Curries i came up with recently where i used some Sun blushed or Sun dried tomatoes and Kaffir Lime leaves to enhance the flavors of the curry. Generally, we  use something citrus like lime or lemon when it comes to Sea food but i preferred  Lime leaves in this one because the  Sun -dried tomatoes provide the needed sourness and sweetness to this curry and Lime leaf will just make it taste more fresh and limey without adding any sourness to the dish. If you can't get hold of Kaffir Lime leaves then use any lime leaves that you can get your hands on.
Not a big fan of Sea food ? Chicken would taste equally good. Vegetarian? Throw in any veggies you like , they are all good. Now, Sun -dried tomatoes should be available in all major super markets and if they are not then make your own. Choose ripe and juicy tomatoes, cut them in half and rub them with some oil, coriander and chopped garlic. If you are in a country where Sun in abundant , leave the tomatoes out  in the sun till they are soft but not crispy. If you are living in a country like The UK where Sun is a luxury , just put them in an oven on very low heat.
Now for the recipe, i used mustard seeds, cumin seeds and fennel seeds for tempering( fennel goes great with sea food). 
-Get a pan on the medium flame, add some oil (some may prefer mustard oil, go for it by all means).Once the oil is hot, throw a couple of cloves, cinnamon sticks and cardamom in it.
-Throw in your mustard, cumin and fennel seeds. Once the mustard seeds start to crackle, add chopped onion, sliced white part of spring onions and turmeric powder. Keep giving the pan an occasional stir. 
-When you see the onions changing their color into sort of golden brown, add a tea spoonful of coriander powder  and a table spoon of ginger and garlic paste. ( I do not like to over power my curry sauce with lots of spices or spice powders especially when i am cooking seafood as this will ruin all those amazing flavors of fish/prawns)So, i just use Coriander powder.
-Once the ginger-garlic paste has been cooked through and you see the oil leaving the paste, time for the chopped tomatoes to go in. Now, it is very important that you add your tomatoes only after ginger and garlic paste is cooked thoroughly.
-Add the finely sliced green part of your spring onions and 4 lime leaves. Cover and cook for 5 mins.
-Once you see all the tomatoes have sort of melted away into a saucy texture add the seasoning( salt and black pepper) and then your sun dried tomatoes.I used a bit of sweet corn and green beans too to add more color and flavor to the sauce.
-Prawns take 2 minutes to cook , so i am not going to add them to the sauce and let them keep cooking as the longer they cook the rubbery they get.( I have seen in lot of Indian house holds that they cook the prawns to death which leaves them flavorless. I like mine juicy and succulent) 
-So, what i do is take a frying pan , add some oil to it and cook my prawns half way through which might take about 45 seconds on each side depending on freshness and size and then add them to the curry sauce just a minute before finishing.
-Once you are happy with you curry sauce ( you can add some coconut milk if you like your sauce creamier)
add your half cooked prawns. Let them cook for a minute and take the curry of the heat.


Sprinkle loads of fresh coriander and some fine sliced spring onions to finish. I like to give the sauce a bit of crunch so i used some toasted almonds flakes but toasted coconut flakes are even better.  
When you taste the sauce, the most wonderful part is you can get the hint of  fragrant lime but not the sourness of it.The sun-dried tomatoes give a bit of sweetness and sourness to compliment the spice.

As i always say, i just get my idea through and you are free to come up with your variations and versions.
Go for it Amigos and Amigas!!! This is worth it!!!

Sunday, 22 July 2012

Simple Summer Sundae for a warm Sunday

Here comes the beautiful sun ...finally after half of the summer is gone. Better late than never. I think he was saving himself for the Olympics that are going to kick off in less than a week. The whole nation is all cheered up and geared up for the biggest sports event of the World.I hope everything goes well and we all will be proud of the event. Yayy!!!Go London!!

 Now, i am a bit pleasantly surprised that my highest hits are from The UK followed by India( thought it would be the other way round) and USA in third place and followed by Russia(this is fantastic as i have no friends in Russia at all) followed by all sorts of countries like Philippines, Netherlands, Belgium, Germany, New Zealand , Taiwan, China etc...Thank you all for checking my blog out. I quite like the International audience bit. It's been 10 days since i have posted and i got a few asking me why am i not posting anything new? This actually motivates me a lot that some of them even follow my blog on a regular basis. I also like to let everyone know that i do not  just randomly pick a recipe from any book or website and post it. I think a lot about the season, the local availability of the the ingredients or their substitutes, preparation time and the ease. I try it in my kitchen beforehand and once i am happy with the result i post it on my blog. It's all tried and tested guys!!!
I was thinking of all sorts of dishes to make today and then when i went to the local 'Taj', i just .fell in love with their fruits section and then i started building this recipe in my head. The perfect fruit and yogurt sundae. I am from South India and we always finish the rice with yogurt ,especially during summer for it's body-cooling tendencies. We quite like to add fruits to our yogurt rice,bananas being most favorite followed by Mango and Pomegranate seeds. So, I took that as my inspiration to this absolutely simple and gorgeous looking dessert. Feel free to go crazy with any kinds of fruits you like. Please, use only fresh fruits and not frozen or canned.This is such  a healthy summer dessert with loads of colors and textures.Give it a go. You will not be disappointed.
The ingredients in the photo is what i used and this is just to give you a rough idea. Sundae is all about building the layers with different colors and textures. So, i used some orange cream wafers, oatmeal cakes and broken corn flakes that end up in the bottom of the box. You can use biscuits, cookies, sponge cake, puffed rice, caramel popcorn, clusters....i don't know.The choice is endless.So this is what we use for base. I used my oatmeal cake for first layer that goes in the bottom of the glass then i built it with some raspberries and bananas to go with crunchy oatmeal cakes and layer of vanilla yogurt followed by a layer of strawberry yogurt. I used low fat out of my own choice. You can go full fat if you like yours more creamier.Then i used orange wafers for my next level followed by guava, more banana and pomegranate seeds.In goes another spoonful of both yogurts and then the final level. cornflakes(i love using frosties)Apple, banana, raspberry and and another spoonful of yogurt. To finish it all off, some guava, remaining berries, desiccated coconut, orange wafers and broken bits of cornflakes. That is all to it guys. Now, if this does not tickle your taste buds then i do not know what will.Try to get your kids involved in building it. They will love it. You can go with any flavored yogurt. You can even flavor your yogurt at home if you have plain yogurt.Try getting a bit of mango pulp or berry puree into it. As i always say, this is just an idea and you can let your imagination run wild and free.
Most important point to remember is not to make in well in advance and keep it in the fridge as this will completely ruin all the different textures as yogurt will soften them up. Get all your prep ready and assemble it just minutes before service so that every spoon has a bite to it. Please do try it and feel free to give me your feedback.Keep the summer rolling fellas....